Easy No-Bake Rum Balls: Your Quick Holiday Treat Recipe
The holiday season is synonymous with warmth, joy, and, of course, an abundance of delicious treats. But who says creating festive magic in the kitchen has to involve hours of baking and mountains of dirty dishes? Enter the humble yet utterly delightful rum ball: a classic, no-bake confection that brings big flavor with minimal effort. If you're searching for the ultimate easy
rum balls recipe that delivers on taste, tradition, and convenience, you've just found your new go-to. These boozy, chocolatey, nutty bites are not only quick to prepare but also make for the perfect edible gift or a spontaneous holiday indulgence.
Why You'll Love This Easy No-Bake Rum Balls Recipe
Forget the oven, the proofing, and the elaborate frostings. Our easy no-bake rum balls are a game-changer for busy holiday schedules, spontaneous gatherings, or simply satisfying that sweet tooth without the fuss. Here’s why this recipe deserves a permanent spot in your festive repertoire:
- Effortless & Oven-Free: The biggest draw is that there’s absolutely no baking involved! This means less time heating up your kitchen and more time enjoying the festivities. It's the ideal project for cooks of all skill levels, especially those who might shy away from traditional baking.
- Speedy Preparation: From start to finish, these delectable morsels come together in under 30 minutes of active prep time. Imagine whipping up a batch of impressive holiday sweets during a quick coffee break!
- Pantry Staple Ingredients: You likely have most of the necessary ingredients on hand. Vanilla wafers, nuts, cocoa, sugar, and a splash of rum – simple, accessible components that transform into something truly special.
- Perfect for Gifting: Beautifully packaged, homemade rum balls are an absolute showstopper. Their robust flavor and attractive appearance make them a thoughtful and much-appreciated present for friends, family, and neighbors. They're also wonderfully portable, making them great for potlucks or office parties. If you’re looking for more inspiration on holiday gifting, don't miss our insights into Classic Holiday Rum Balls: The Perfect Edible Christmas Gift.
- Rich, Traditional Flavor: Inspired by classic recipes from the 1950s, these rum balls capture that nostalgic holiday spirit. The blend of rich chocolate, fragrant rum, and crunchy nuts creates a complex flavor profile that feels both comforting and celebratory.
The Essential Ingredients for Perfect Rum Balls
Crafting the perfect rum ball starts with understanding the role each ingredient plays. This thoughtful combination ensures a delightful texture and an unforgettable flavor.
- Vanilla Wafers: These form the backbone of our rum balls. Their mild sweetness and subtle vanilla flavor allow the rum and chocolate to shine without being overpowering. They also contribute significantly to the fudgy texture once crushed and moistened.
- Substitutes: If vanilla wafers aren't available, graham crackers are an excellent alternative. Their mild flavor profile works beautifully. For a richer, buttery note, shortbread cookies can also be used, though you might adjust the sweetness slightly.
- Pecans: Providing a delightful crunch and a buttery, nutty aroma, pecans are a traditional choice. When lightly toasted, their flavor intensifies, adding a depth that elevates the entire treat.
- Pro Tip: Always toast your nuts! Spreading them on a baking sheet and toasting them in a preheated oven (or even a dry skillet on the stovetop) for a few minutes until fragrant makes an enormous difference in flavor.
- Substitutes: Walnuts, hazelnuts, almonds, or even macadamia nuts can be used to suit your preference. Each nut will impart its own unique character.
- Confectioners' Sugar (Powdered Sugar/Icing Sugar): This fine sugar is crucial for no-bake recipes as it dissolves easily without heat, ensuring a smooth texture. It provides the necessary sweetness and also helps bind the mixture.
- Baking Cocoa: For that essential chocolatey depth without adding extra sweetness or a dense, cakey texture. Choose a good quality unsweetened cocoa powder for the best results.
- Rum: The star of the show! Dark rum is typically preferred for its robust, caramel-like notes that perfectly complement the chocolate and nuts. The alcohol not only imparts flavor but also acts as a preservative.
- Substitutes: Bourbon or brandy can offer a similar warming, boozy profile. For a non-alcoholic version, you can substitute the rum with rum extract (use sparingly, as it's concentrated) mixed with a little water or even a splash of apple juice for a kid-friendly treat.
- Honey (or Maple Syrup): This acts as a primary binder, helping all the dry ingredients come together into a shapeable dough. Honey adds a lovely floral note that pairs wonderfully with rum, while maple syrup offers a rich, earthy sweetness that evokes autumn and winter spices.
- Substitutes: Golden syrup is a great 1:1 swap if you can find it.
- Water: Just a touch of water helps achieve the perfect consistency, ensuring the mixture is moist enough to shape but not overly sticky.
Crafting Your Easy Rum Balls: A Step-by-Step Guide
Making these holiday delights is surprisingly simple. Follow these steps for perfect rum balls every time:
- Prepare Your Crumbs: In a food processor, pulse your vanilla wafers until they form fine, even crumbs. The finer the crumbs, the smoother and more cohesive your rum balls will be, making them easier to shape. If you don't have a food processor, place the wafers in a sturdy resealable plastic bag and crush them with a rolling pin.
- Toast and Grind Nuts: If not already toasted, spread your pecans on a baking sheet and toast them in a preheated oven at 350°F (175°C) for 5-7 minutes until fragrant. Let them cool completely, then pulse them in the food processor (or chop finely by hand) until they're a fine grind.
- Combine Dry Ingredients: In a large mixing bowl, combine the crushed vanilla wafers, ground pecans, confectioners' sugar, and baking cocoa. Whisk them together thoroughly until all ingredients are evenly distributed.
- Mix Wet Ingredients: In a separate small bowl, whisk together the rum, honey (or maple syrup), and water until well combined.
- Bring It All Together: Pour the wet ingredient mixture into the dry ingredients. Use a sturdy spoon or your hands to mix everything until a firm, uniform dough forms. It should be moist enough to hold together when squeezed but not overly sticky. If it feels too dry, add a tiny bit more rum or water, a teaspoon at a time. If it's too wet, add a tablespoon of extra crushed wafers.
- Shape the Balls: Take small portions of the mixture (about 1 tablespoon) and roll them between your palms into uniform 1-inch balls.
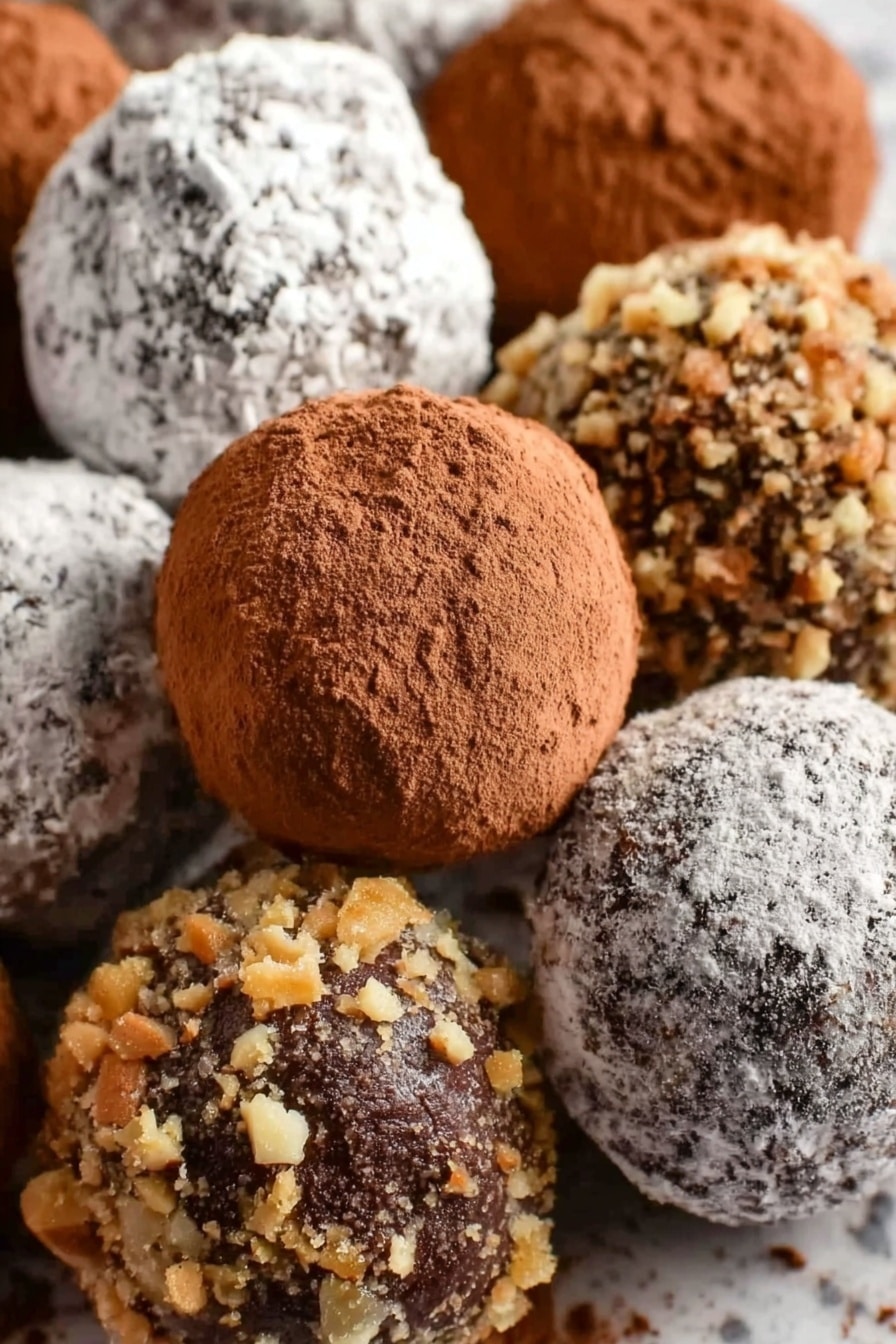
- Coat for Appeal: Prepare your coating options. Place additional confectioners' sugar in one shallow dish (or a resealable plastic bag) and extra crushed vanilla wafers (or cocoa powder, sprinkles, etc.) in another. Roll or shake each rum ball in your chosen coating until evenly covered. This not only adds visual appeal but also prevents them from sticking together.
- Store and Chill: Place the coated rum balls in an airtight container. Store them in the refrigerator for at least an hour to allow them to firm up and for the flavors to meld beautifully. They become even more fudgy and flavorful the longer they sit.
Pro Tips for Elevating Your Rum Balls
While the basic recipe is straightforward, a few expert tricks can take your rum balls from good to absolutely unforgettable.
- Achieve the Perfect Texture: As mentioned in the steps, finely blending your cookies and nuts is key. This ensures a cohesive dough that holds together beautifully and contributes to that desirable fudgy consistency. For even more insights into achieving the perfect texture and flavor, explore our article on Master Fudgy Rum Balls: Pro Tips & Ingredient Swaps.
- Don't Skimp on the Rum (or its Quality): The rum is the star, so opt for a dark rum you enjoy drinking. A better quality rum will significantly enhance the final flavor.
- Chill for Optimal Flavor & Texture: While tempting to eat immediately, these rum balls truly improve with time. Refrigerating them for a few hours, or even overnight, allows the flavors to deepen and the texture to become wonderfully fudgy. For the best eating experience, let them sit at room temperature for about 30 minutes before serving.
- Get Creative with Coatings: Beyond confectioners' sugar and wafer crumbs, consider rolling your rum balls in cocoa powder for a sophisticated look, shredded coconut for tropical flair, or even a drizzle of melted dark or white chocolate once they're chilled.
- Spice It Up: A pinch of cinnamon, nutmeg, or allspice added to the dry ingredients can infuse your rum balls with even more holiday spirit.
- Mess-Free Coating: To coat your rum balls without getting your fingers sticky, place the confectioners' sugar (or other coating) in a resealable plastic bag, add a few rum balls, and gently shake the bag until they are evenly coated.
Gifting and Sharing Your Homemade Rum Balls
Rum balls are not just a treat for yourself; they are a cherished tradition of sharing during the holidays. Arrange them in decorative tins, small boxes, or cellophane bags tied with festive ribbons. They travel well, making them an excellent choice for mailing to loved ones far away. Because they don't require refrigeration for short periods and their flavors mature over time, they are perfectly suited for gift-giving.
The best part? This easy
rum balls recipe isn't just for Christmas. While traditionally associated with the festive season, these delightful no-bake treats are perfect for any occasion when you need a quick, delicious, and slightly boozy indulgence.
So, this holiday season, skip the baking marathon and embrace the simplicity and deliciousness of these easy no-bake rum balls. They're a testament to how the simplest ingredients, combined with a touch of holiday cheer, can create truly memorable magic in every bite. Enjoy!